API test for load balancing and auto scaling using Jmeter
Load testing is important for every application as it is essential to know how much traffic an application can take. Almost all popular applications will have enormous traffic to their websites.
It is required to check the load testing before the application is published where there are many tools to check the load testing. We use the most advanced open-source tool Apache Jmeter for load testing and load balancing. Here we are getting started with Apache Jmeter for load testing.
Prerequisites for load testing

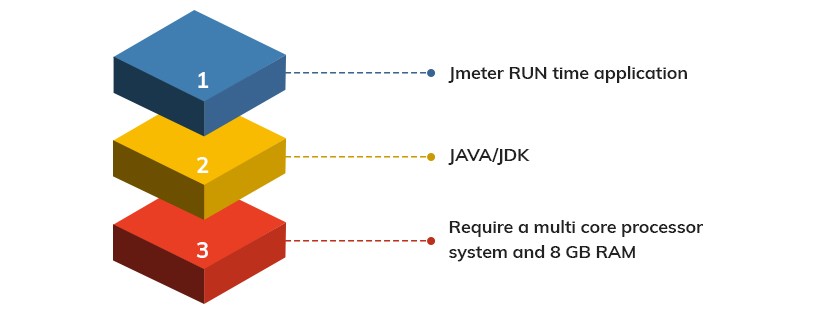
- Jmeter RUN time application
- JAVA/JDK
- Require a multi core processor system and 8 GB RAM or above systems which allows to test more concurrent users.
To download Apache jmeter and JAVA installation, visit the website http://jmeter.apache.org/
Download Jmeter
Check for the download releases and download the latest version based on the Operating system. Then, you can download the ZIP file available under binaries.
For Windows, you can download
Apache-jmeter-5.2.1.zipsha512pgp
For Apple and Linux, download
Apache-jmeter-5.2.1.zipsha512pgp
After downloading the latest jmeter in the system, extract the ZIP folder. Then open the Apache jmeter folder and go to the BIN directory. Click and Run jmeter batch file to launch the JMeter. Prior to that we need to install JAVA on your machine. Then, we need to go to the Oracle website to download the latest JDK to the system. Based on the OS, choose the proper JDK file system and click on download. As we have a windows system, we are downloading jdk-13.0.2_windows-x64_bin.exe
Install Java
After downloading and installing JAVA, then it is required to setup the environment path variable for JAVA. We can set JAVA path in system settings. After JAVA is successfully installed and configured in the system, check whether it is available in your system or not. Then go to RUN and check in command prompt. Use command java -version to check java installed version.
How to Create Test Plan and Run Using Jmeter:
Here we create a sample test for signup and login for a website
Goto Apache jmeter folder → Bin → Click on Jmeter.bat file to launch the jmeter application
Create and run a test plan
First, create a new test plan. Then, create a new thread group under test plan. The test plan can have many threads based on test scenarios. Then we can check the Signup and Login users load testing on an application.
Then add HTTP request under the threadgroup. We can test both http or https requests. We just need to hit the simple Http website URL. Then, mention IP address in the server name or IP field. Then, add “listener” to see the request results and also add a listener under the thread group. It is very simple to hit the server request. Then you can click on the RUN button to run the test. Here comes our test run as successful.
Increase the load on the Website
Goto thread group configuration.
i) Number of thread users: Define how many users or requests are accessing the URL based on the required load.
ii) Ramp-up period speed: Specify the time frame as within the given time the test has to be executed successfully.
iii) Loop Count: We can define how many times the test has to execute.
Now summarize the above configuration:
10 users in 2 seconds 2 times need to access the website. Now lets run this test. 10*2= 20 requests has to hit the website URL.
If our test summary has any errors, we saw the URL hitting with specified load. Next we are going to see the signup to the website.
How to give the load to Sign Up API?
Now pass API URL in the path Field. Reading the API response needs to give UTF-8 format. Check the post method and mention the method type. Now lets add the API parameters. Now add the parameters to signup for API. In the same way, we have to add the remaining parameters. Here use the dynamic parameters. We have user-defined variables to send unique email and phone numbers. Add the user-defined variables.
This is the detailed process of how to successfully test API using Jmeter.
Amazon EC2 scaling and how load is shared in between the server instances.
Here, we give more load to the application and check using the Amazon EC2 scaling. When we give maximum load to the application the amazon EC2 creates replica instances and balance the load on the server.
How to check load and instance creation?
Here we check 4000 concurrent users login into the website and use the autoscaling of EC2. Here we can check the DB auto scaling based on load.
Amazon gives these features to protect and give steadiness to the application when there is heavy traffic to the application.
Let’s have a look at the demo:
Check the login API and need to pass valid parameters. We can pass the dynamic user credentials to test the load or else we can give static user credentials test load with the same user.
The same user details will be reused and created as virtual users based thread users. Since we have some restrictions running Jmeter in GUI Mode. We will run the test in Non GUI mode which will reduce the load on the system and the test will run smoothly.
Finally the script is saved, lets run the test. Let’s login to the amazon console and monitor the EC2 scaling and DB auto scaling. We can observe that the new instances will be created and new DB replicas will be created. Sign in to amazon console. Now lets run the test in Non GUI
The file is saved on the desktop and navigate the jmeter folder path, after that we need to input the jmeter run command.
jmeter -n -t test file path (.jmx file)
Then enter to run the test script. Based on the load, the tasks are created.
By default it will be one task. Based on load it will create new instances. Transfer/share the load with new instances. The containers are increased from 1 to 3. Let’s check the DB replicas. By default, we have one write DB and one read DB. Based on connections and load to DB the read replicas will be created and used. You can see the 3 read replicas are created.
See our test has completed with 0 errors.
Here, the application has handled 4000 user login successfully.


